As this blog was created to help me clear my stash I thought I should give an update.
Here it is two months into the year, or 53 days into this project, and I don't seem to notice a difference. In fact, if anything I've suffered a setback.
The dog sweaters that I started with have cleared out about 2 yards of scrap fabrics, and the bed jackets or shawls another 6 yards, and the capes a little more than half a yard. That makes for less than 10 yards used up in the first 53 days.
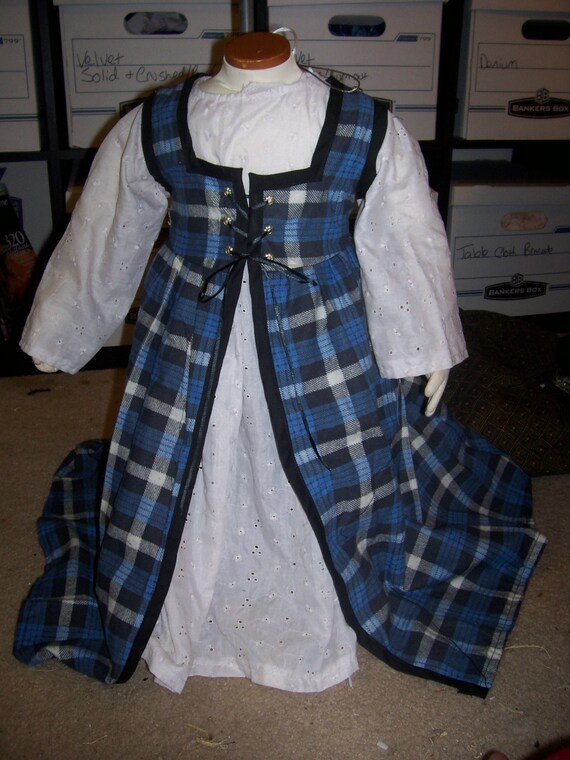
I did have two orders for this adorable overdress which ate up another 3 yards. However I also had to venture to the fabric store to buy fabric for an under dress. Yes, I actually had to purchase fabric because I did not have any cotton in that color. Unfortunately for my poor sewing nook, they were having a clearance sale and I went home with an additional 45 yards.
So 53 days in I'm at +32 yards, but I'm also full of ideas and will soon have new items in the shop, and more tutorials here.
If you'd like to help me dwindle down my stash, I have many custom listings in my shop here.
Friday, February 22, 2013
Saturday, February 16, 2013
Why for art thou Capelet? And a French Seam at that!
One day while wasting way too much time on Pinterest, I came across this blog of a lady and her attempt to make an elf cape for her little one. This gave me an idea.
What could be easier than making a circle cape?
The first thing I did was measure my dummy. This one is sized at 6months.
I decided that I wanted the cape to be 9 inches long, so it would hit about the diaper.
The next step was to measure out a length of fabric 18 inches long. This fabric is 45 inches wide.
I then folded the fabric in half so that it would measure 9 inches wide and began my circle by pining the tape measure in the corner and following the 9 inch mark around with my marker. This can also be done with a length of string.
Now we open it up and we have a half circle
I then folded the fabric again to form a neck opening. Because this will be open in the front, a 3 inch circle is enough, and a 3 inch bit of fabric in the front seemed to look good to me, so I folded the fabric down 6 inches and then from the fold completed a 3 inch circle as we did before.
Open and we can see the capelet coming to shape.
Now, with the width of the fabric being 45 inches, I had a choice to use the extra bit to make a hood, or I could make another capelet. I chose the second option. This did however end with two half circles rather than one whole one. As this is a bit of flannel, and would possibly be seen on both sides, I wanted as neat a back seam as possible, so I chose to do a French seam.
Start by sewing the back seam with right sides together.
I then trimmed the seam down to about an 1/8 inch.
Folding wrong sides together, I trap the seam and sew another 1/4 seam.
Unfold and you have this.
So far, so good. Now press the seam down, make it as flat as possible.
And top-stitch as closely to the edge as possible. You're sewing down this little flap that you have created.
This will create an almost invisible seam that will look as neat on the back as it does on the front.
Now I finished off with a bit of black bias, sewn all around the cape. Use your favorite method for this.
Now we just need a way to close the front. I chose buttons and a loop. I think that it adds a bit of flair to it. You could use a cloak clasp, or button and button hole, or snaps or hooks.
To do this, I first folded a 2 1/2 inch length of ribbon in half and sewed it to one side of the capelet.
I then added a button right on top of the stitching, and one on the other side an equal distance apart.
And it's done.
Again, this dummy is sized at 6 months, but this little capelet could add a touch of whimsy to costumes up to a 2T. In fact, the chemise on this dummy is a 2T, so you can see when it would drop on a child of that size.
If you would like to buy this item, you may purchase it here.
Or check out my shop for other goodies.
Subscribe to:
Posts (Atom)


